
Secure database authentication using AWS IAM

Photo by Mika Baumeister on Unsplash
Generally, either the database credentials are hard-coded or referred from a secure location at the run time within the application. In both the cases, we use long-term credentials for database authentication even if we periodically rotate the database credentials. We usually rotate these credentials every 30, 60, 90 or X days depending on the compliance level.
Though adding the database credentials within the application code or setting it as an environment variable improves the application performance by reducing an additional hop it increases the risk of exposing the credentials to all those people who have access to the source code or the environment running the application. To avoid the exposure of the database credentials, you should either refer it from a secure location at the runtime or generate a short-lived authentication token using IAM database authentication feature which is valid only for 15 minutes.
In this article, we will use the later option i.e., use a short-lived authentication token for database authentication.
Note: As of writing this article, IAM database authentication is only supported for MariaDB, MySQL and PostgreSQL databases created via AWS RDS. Please refer to the AWS doc to check all the database versions that support IAM database authentication.
RDS Database
Note: Please make sure your AWS CLI is configured with the appropriate permissions to successfully run the below mentioned aws commands.
We start by creating an RDS PostgreSQL database with IAM authentication enabled.
1. Create database security group
aws ec2 create-security-group --group-name rds-auth-demo --description "Security group for RDS database" --vpc-id vpc-xxxxx2. Add security group ingress rule
aws ec2 authorize-security-group-ingress --group-id sg-xxxxx --protocol tcp --port 5432 --cidr "0.0.0.0/0"DB Security Group
3. Create database subnet group
aws rds create-db-subnet-group --db-subnet-group-name rds-auth-demo --db-subnet-group-description "Subnet group for postgres database" --subnet-ids "subnet-xxxxx" "subnet-xxxxx"DB Subnet Group
4. Create database instance
aws rds create-db-instance --db-name demo --db-instance-identifier rds-auth-demo --db-instance-class db.t3.micro --engine postgres --port 5432 --engine-version 14.2 --master-username demo --master-user-password xxxxx --vpc-security-group-ids sg-xxxxx --no-multi-az --publicly-accessible --enable-iam-database-authentication --storage-type gp2 --db-subnet-group-name rds-auth-demo --allocated-storage 20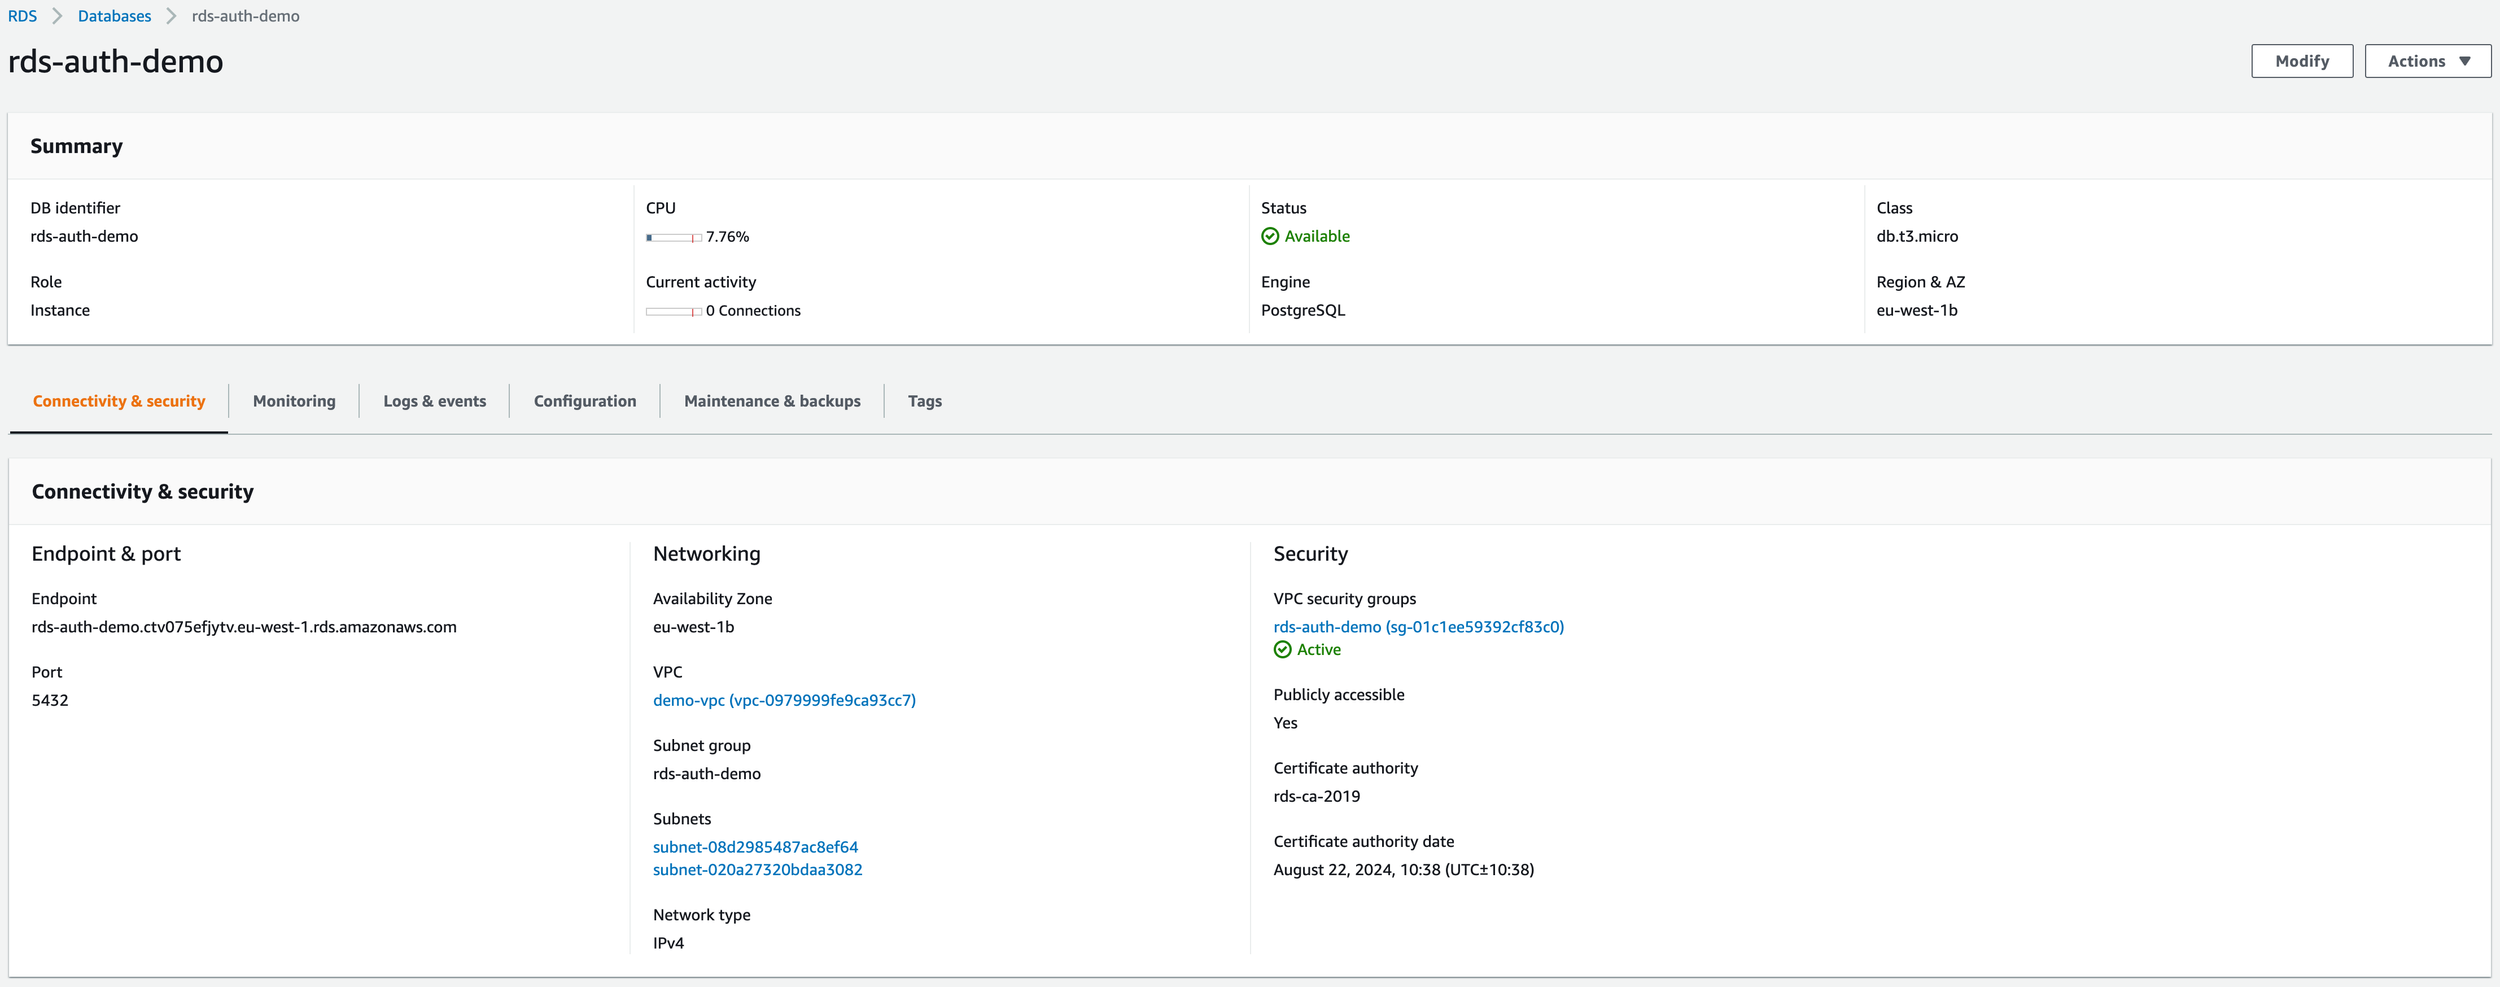
DB Instance
DB User
Now that our RDS PostgreSQL database is ready we need to create a new db user which we will use within our application for authenticating with the database using the short-term credentials.
1. Login using master user
psql -h DB_ENDPOINT -d DB_NAME -U DB_USERMaster User Login
2. Create DB user
CREATE USER demo_user;
GRANT rds_iam TO demo_user;DB User Creation
IAM Policy
Next, we need is an IAM policy that will allow our application to request temporary database credentials.
{
   "Version": "2012-10-17",
   "Statement": [
      {
         "Effect": "Allow",
         "Action": [
             "rds-db:connect"
         ],
         "Resource": [
             "arn:aws:rds-db:AWS_REGION:AWS_ACCOUNT_ID:dbuser:DB_RESOURCE_ID/DB_USER"
         ]
      }
   ]
}
Note: Please make sure to replace the placeholders in the policy with the actual value.
To fetch the DB_RESOURCE_ID run the following command:
aws rds describe-db-instances --db-instance-identifier rds-auth-demo --query 'DBInstances[0].DbiResourceId'Once the policy is created, attach it to the IAM principal that will make the request for generating temporary database credentials.
IAM Policy
Connect to DB
Now that we have everything in place let’s generate temporary database credential and authenticate to PostgreSQL database using the same.
1. Generate temporary credential
export PGPASSWORD="$(aws rds generate-db-auth-token --hostname RDS_ENDPOINT --port 5432 --region AWS_REGION --username DB_USER )"DB Temporary Credential
If your command executes successfully you should have a temporary authentication token that is valid for 15 minutes stored in the PGPASSWORD variable.
2. Connect to database
PGPASSWD=${PGPASSWORD} psql -h RDS_ENDPOINT -d DB_NAME -U DB_USERIAM Database Authentication
Note: In case you receive authentication failure error, make sure your IAM policy has correct resource ARN set and while generating the temporary authentication token you are passing the correct database details.
We connected to the PostgreSQL database using the AWS CLI but the same is also supported via AWS SDK so that your application can securely connect to the database using the short-lived credentials.
Awesome! The connection between your application and database is now more secure compared to the traditional approach.
Covering the basics
-
With the help of IAM DB authentication feature you no longer need to use the long-term credentials for accessing the database. Instead, you generate a short-lived authentication token to access the database. As of writing this article, IAM DB authentication is only supported for MariaDB, MySQL and PostgreSQL databases created via AWS RDS.
-
AWS IAM authorisation is defined using an IAM policy that is written in JSON format. The evaluation logic of IAM authorisation starts with a Deny if no policy is present. Next, it checks if an explicit deny is present for the request made. If yes, the request is denied else it allows the request provided an Allow policy is present for the request type but if not it’s a Deny.
-
CLI:
aws rds describe-db-instances --db-instance-identifier DB_INSTANCE_NAME --query “DBInstances[0].MasterUsername”
Console:
Login to AWS Management Console
Navigate to RDS service
Using the left panel, click on the Databases
Click on the DB Identifier
Switch to the Configuration tab to find the master username
You cannot view the database password once it is set. In case, you forget your password you can set a new one for your database.
-
In simple terms, authentication is about verifying the identity and authorisation is validating if the authenticated identity is allowed to perform an action. For example, if you are student in the university, your student card will certify your identity but might not allow you to enter every room within the university.
-
AWS IAM (Identity and Access Management) is a global service that takes care of both authentication and authorisation for principals that need to interact with AWS services. Once the principal is authenticated the identity-policy and if applicable resource-policy are used for authorising the requests.